What Are The Important Accessories You Need For Your iPad?
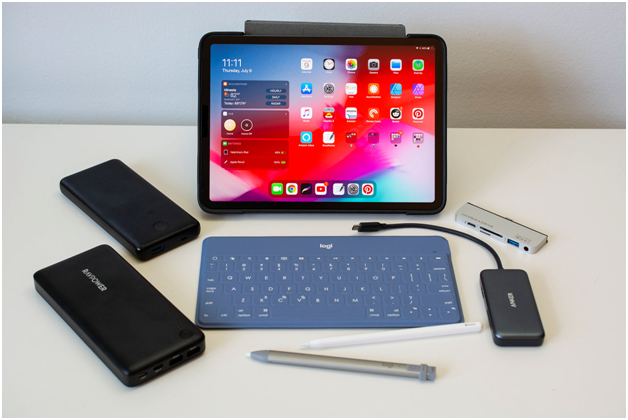
IPad does come with lots of accessories which you need to buy to make your iPad work like a pro. These accessories can be bought from Apple stores, online Apple store or from Amazon or from such online sites that offer these products. Also you can control your physical home accessories on Home App on iPad.
Here are few of the important accessories you need for your iPad and are a must to make the full use of your iPad.
1. Apple 20W USB-C Power Adapter
Power Adaptor is most needed iPad accessory and one should get this to make iPad run all smooth. With the ability to fast charge an iPhone battery 50% in 30 minutes, it’s also perfect for any other product that uses a USB-C port, such as the HomePod mini or the iPad.
According to Apple the Apple 20W USB‑C Power Adapter offers fast, efficient charging at home, in the office, or on the go. While the power adapter is compatible with any USB‑C-enabled device, Apple recommends pairing it with the iPad Pro and iPad Air for optimal charging performance. You can also pair it with iPhone 8 or later to take advantage of the fast-charging feature.
You can buy this product online at Amazon
2. 2m USB-C to USB-C and USB-C to Lightning cables
If you want lightning cable for your iPad then you can have a 2m cable.
Though you can find third-party options that are longer, but Apple offers you a great size of cable without overpricing it. You can use these cables to connect to your Mac, iPhone, or iPad with different power bricks.
Also if you love to text in bed with your iPad charging, a 2m USB-C to Lightning cable is the go-to product.
You can buy this cable for $35 from Amazon
3. 2nd-gen Apple Pencil
There are more iPads than ever supporting the 2nd-generation Apple Pencil. Apart from many iPad Pro models, the new iPad Air and iPad mini also support this accessory.
The Apple Pencil is great for users who are passionate about drawing, writing, or taking notes. It also attaches very nicely on the side of the iPad with no more weird design choice with the accessory connecting to the Lightning connector.
You can buy this accessory from Apple store or Amazon
4. An Arm Mount
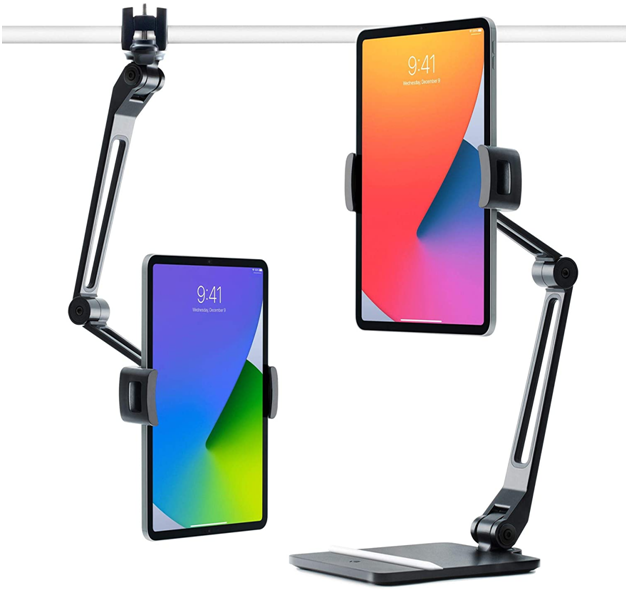
Mounting your iPad on a stand saves space as well as saves your eyes. Also you can adjust the angle and height of the screen. Twelve South’s HoverBar Duo arm mount is best for iPad and lets you see incoming notifications on the iPad immediately, and it’s easy to remove the slate when you want to browse before bed. The clamp is fairly slim and doesn’t need much clearance, so you can attach it to shelves, kitchen counters, or bed frames.
If you do want to use a stand instead, Twelve South includes one, and it can raise the iPad’s screen fairly high. It supported the 12.9-inch iPad Pro and the base iPad with no trouble. If the hinges ever start feeling a little loose, you can tighten ’em up with the included hex key.
You can buy this product from Amazon
5. A Keyboard and Trackpad
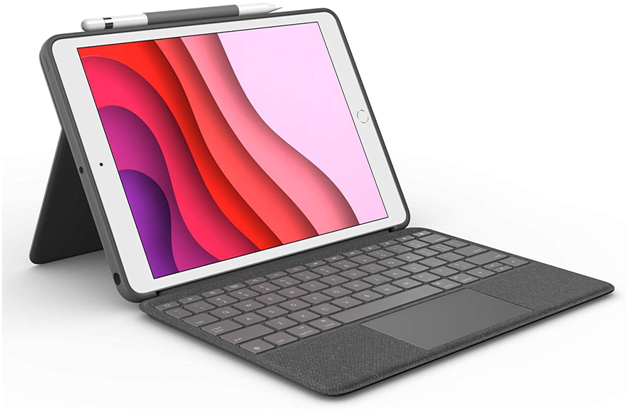
Logitech Combo Touch offers this accessory if you plan on doing work on iPad, you should invest in a keyboard and trackpad. The Combo Touch has both. It’s also detachable, so you can ditch the keyboard part and still have a case. It’s impossible to dislike. The whole package is fairly slim, has a lovely fabric texture that’s nice to the touch, and looks spiffy!
The backlit keys are helpful if you’re in a dark room, and the typing experience is pretty nice. Best of all, it connects via Apple’s Smart Connector, so there’s no need to futz about with Bluetooth or worry about charging it.
6. A Bluetooth Keyboard
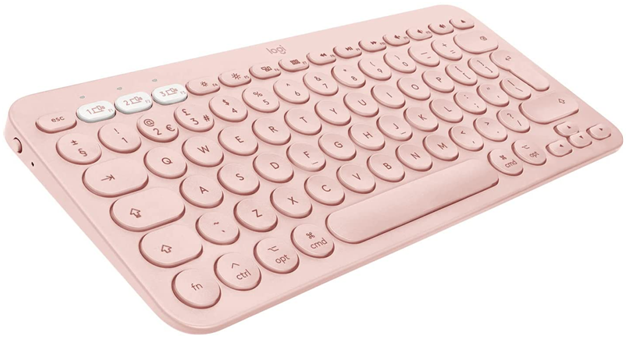
Logitech K380 is the Bluetooth Keyboard accessory for your iPad. It comes in a fun pink color. It’s a quiet but tactile keyboard, and you can connect it to a total of three devices and switch between them quickly. It’s slim, lightweight, and portable. Plus, it’s powered by two AAA batteries, which lasts for months.
7. A Hub With a Built-In Stand
This stand is built by Satechi Aluminum Stand & Hub and is best for office and school goers that work on iPad. You probably need to add more ports, like an HDMI port to hook up the tablet to a bigger 4K screen or a headphone jack in case you need to use corded headphones. This one from Satechi kills two birds with one stone. It’s a hub, so you get an HDMI port, USB-A, 3.5-mm audio port, SD and MicroSD card reader, and a 60-watt USB-C charging port. But it also works as a stand, so you don’t need a folio case or separate stand to prop your slate up.
The hub connects to the iPad Pro or iPad Air via USB-C (the cable hides away underneath). You can’t change the viewing angle, but the stand folds up. It won’t take up too much space in your backpack, and it’s lightweight. However, if you plan on propping your tablet up vertically for video calls, you’ll have to lean forward so your face is in the center of the frame.
Costing $100 you can buy this from Amazon
Besides these important accessories on your iPad there are many more which you can find online.
Home on iPad- Is it an Accessory?
In the Home app , you can add more than one physical space—a home and a small office, for example.
- Tap Add button, then tap Add New Home.
- Name the home, choose its wallpaper, then tap Save.
- To switch to another home, tap the home and home settings button, then tap the home you want.
How to set up accessories with Home on iPad?
The first time you open the Home app the setup assistant helps you create a home, where you can add accessories and define rooms. If you already created a home using another HomeKit-enabled app, you’ll skip this step.
Add an accessory to Home
Before you add an accessory such as a light or camera, be sure that it’s connected to a power source, is turned on, and is using your Wi-Fi network.
Tap Home in the sidebar, then tap the Add button
Tap Add Accessory, then follow the onscreen instructions.
When you add an accessory, it’s assigned to a default room, or a room you choose.
You may need to scan a QR code or enter an 8-digit HomeKit setup code found on the accessory itself (or its box or documentation). A supported smart TV displays a QR code for you to scan. You can assign the accessory to a room, and give it a name, and then use this name when controlling the accessory with Siri. You can also add suggested automations during set up.
When you set up Apple TV in tvOS and assign it to a room, it automatically appears in that room in the Home app on iPad.
Change an accessory’s room assignment
In the sidebar, choose the room the accessory is currently assigned to.
If it’s not already assigned, look in Default Room.
Touch and hold the accessory’s button, then swipe up or tap the settings button
Tap Room, then choose a room.
Turn on Include in Favorites to add the accessory to the Home screen in Home.
To rearrange your favorites, tap the home and the home settings button, tap Edit Screen, then drag the accessory buttons into the arrangement you want. Tap Done when you’re finished.
Organize rooms into zones
Group rooms together into a zone to easily control different areas of your home with Siri. For example, if you have a two-story home, you can assign the rooms on the first floor to a downstairs zone. Then you can say something to Siri like “Turn off the lights downstairs.”
Tap the home and home settings button, then tap Home Settings.
Tap Zone, then tap an existing zone, or tap Create New to add the room to a new zone.
Edit a room
You can change a room’s name and wallpaper, add the room to a zone, or remove the room. When you remove the room, the accessories assigned to it move to Default Room.
Tap the home and home settings button, then tap Home Settings. , then tap Room Settings.
Tap a room, then make your changes.
How to control accessories on Home?
To Control accessories in the Home app
Tap Home or a room in the sidebar, then tap the button for the accessory—a light, for example—to quickly turn the accessory on or off, or touch and hold the button until controls appear.
The available controls depend on the type of accessory. For example, with some lightbulbs, there are controls for changing colors. With your smart TV, you can choose an input source.
Control accessories in Control Center
When you’re home with your iPad, you can see the relevant scenes and accessories for that moment in Control Center. For example, a coffee maker may appear in the morning and be replaced by your bedside lamp at night.
Open Control Center, then tap a button to turn an accessory on or off, or touch and hold the button until controls appear.
To quickly see all your favorite scenes and accessories (except cameras), tap the home favorites button.
If you don’t want accessories to appear in Control Center, go to Settings Control Center, then turn off Show Home Controls.
To edit accessory settings, touch and hold the accessory’s button, swipe up or tap the settings button, then do any of the following:
Rename an accessory: Tap the delete button to delete the old name, then type a new one.
Change an accessory’s icon: Tap the icon next to the accessory’s name, then select a new icon. If you don’t get a choice of other icons, it means the icon can’t be changed for this accessory.
- With Group accessories you can control multiple accessories with the tap of a button by grouping them.
- Touch and hold an accessory, swipe up on the screen or tap the settings button, then tap Group with Other Accessories.
- Tap the accessory you want to group with this accessory—another light in the room, for example.
- In the Group Name field, type a name for the group.
- Tap Done.
If you want the group to appear on the Home screen in Home, turn on Include in Favorites.
How to view your home status?
The Home app shows you issues that might need your attention—for example, your front door is unlocked, an accessory’s battery is running low, or a light is on during the day. You can often address the issue with just a tap.
Open the Home app then tap Home in the sidebar.
Tap any of the round buttons that appear just below your home’s name.
Touch and hold a button that represents a group of accessories—three lights that are switched on in two rooms, for example—and you can separately control the accessories for each room. In this case, you can turn off the two lights in the living room but leave the kitchen light on. Tapping the button controls all the accessories in the group—turns all the lights on or off, for example.
You can also turn on Adaptive Lighting
Some lights let you adjust their color temperature, from cool blue to warm yellow. You can set supported lights to automatically adjust the color temperature throughout the day. Wake up to warm colors, stay alert and focused mid-day with cooler ones, and wind down at night by removing blue light.
Touch and hold a lighting accessory that supports Adaptive Lighting.
Tap the adaptive lightning button.
There are many things you can do with accessories on iPad.


